Run the application
- Understand the application
- Run the application
- Simulate failures
Now that you understand the Workflow and Activities, run the application. You'll start the Workflow, watch it appear in the Web UI, then start a Worker that executes the Activities and completes the transfer.
Start the Workflow
You have two ways to start a Workflow with Temporal: via the SDK, or via the temporal command-line tool. In this tutorial you use the SDK.
To start a Workflow Execution, you connect to the Temporal Cluster, specify the Task Queue the Workflow should use, and start the Workflow with the input parameters it expects.
The Task Queue name is defined in shared.go:
const MoneyTransferTaskQueueName = "TRANSFER_MONEY_TASK_QUEUE"
The file start/main.go contains a program that connects to the Temporal Server and starts the Workflow:
func main() {
	// Create the client object just once per process
	c, err := client.Dial(client.Options{})

	if err != nil {
		log.Fatalln("Unable to create Temporal client:", err)
	}

	defer c.Close()

	input := app.PaymentDetails{
		SourceAccount: "85-150",
		TargetAccount: "43-812",
		Amount:        250,
		ReferenceID:   "12345",
	}

	options := client.StartWorkflowOptions{
		ID:        "pay-invoice-701",
		TaskQueue: app.MoneyTransferTaskQueueName,
	}

	log.Printf("Starting transfer from account %s to account %s for %d", input.SourceAccount, input.TargetAccount, input.Amount)

	we, err := c.ExecuteWorkflow(context.Background(), options, app.MoneyTransfer, input)
	if err != nil {
		log.Fatalln("Unable to start the Workflow:", err)
	}

	log.Printf("WorkflowID: %s RunID: %s\n", we.GetID(), we.GetRunID())

	var result string

	err = we.Get(context.Background(), &result)

	if err != nil {
		log.Fatalln("Unable to get Workflow result:", err)
	}

	log.Println(result)
}
Make sure you've installed Temporal CLI on your local machine.
Start the Temporal development server with the following command, which specifies a database file and sets the Web UI port to 8080:
temporal server start-dev --db-filename your_temporal.db --ui-port 8080
Temporal's development server uses an in-memory database by default, and that won't work for the demonstrations in this tutorial. Specifying a database file ensures that records persist when you restart the service. Remember to specify the same database file each time.
Then run start/main.go from the project root:
go run start/main.go
On first run Go may download dependencies; afterwards you'll see output like the following:
2022/11/14 10:52:20 INFO  No logger configured for temporal client. Created default one.
2022/11/14 10:52:20 Starting transfer from account 85-150 to account 43-812 for 250
2022/11/14 10:52:20 WorkflowID: pay-invoice-701 RunID: 3312715c-9fea-4dc3-8040-cf8f270eb53c
The Workflow is now running. Leave the program running.
View the state of the Workflow in the Web UI
Visit the Temporal Web UI, where you will see your Workflow listed.
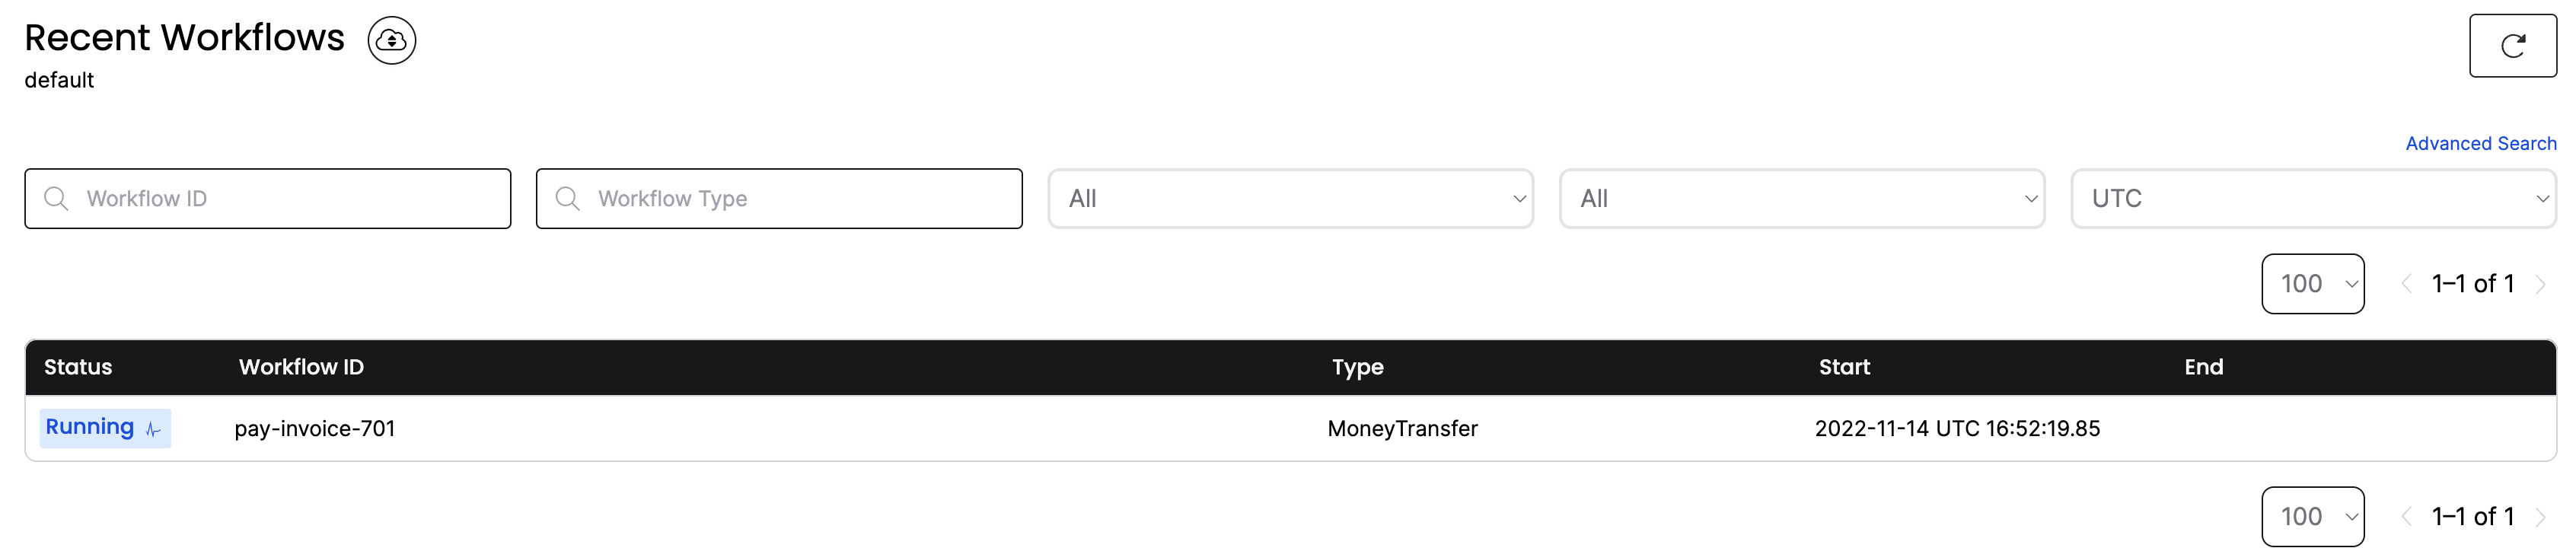
Click the Workflow ID. You can see everything about the execution: inputs, timeout configurations, scheduled retries, number of attempts, stack traces, and more.
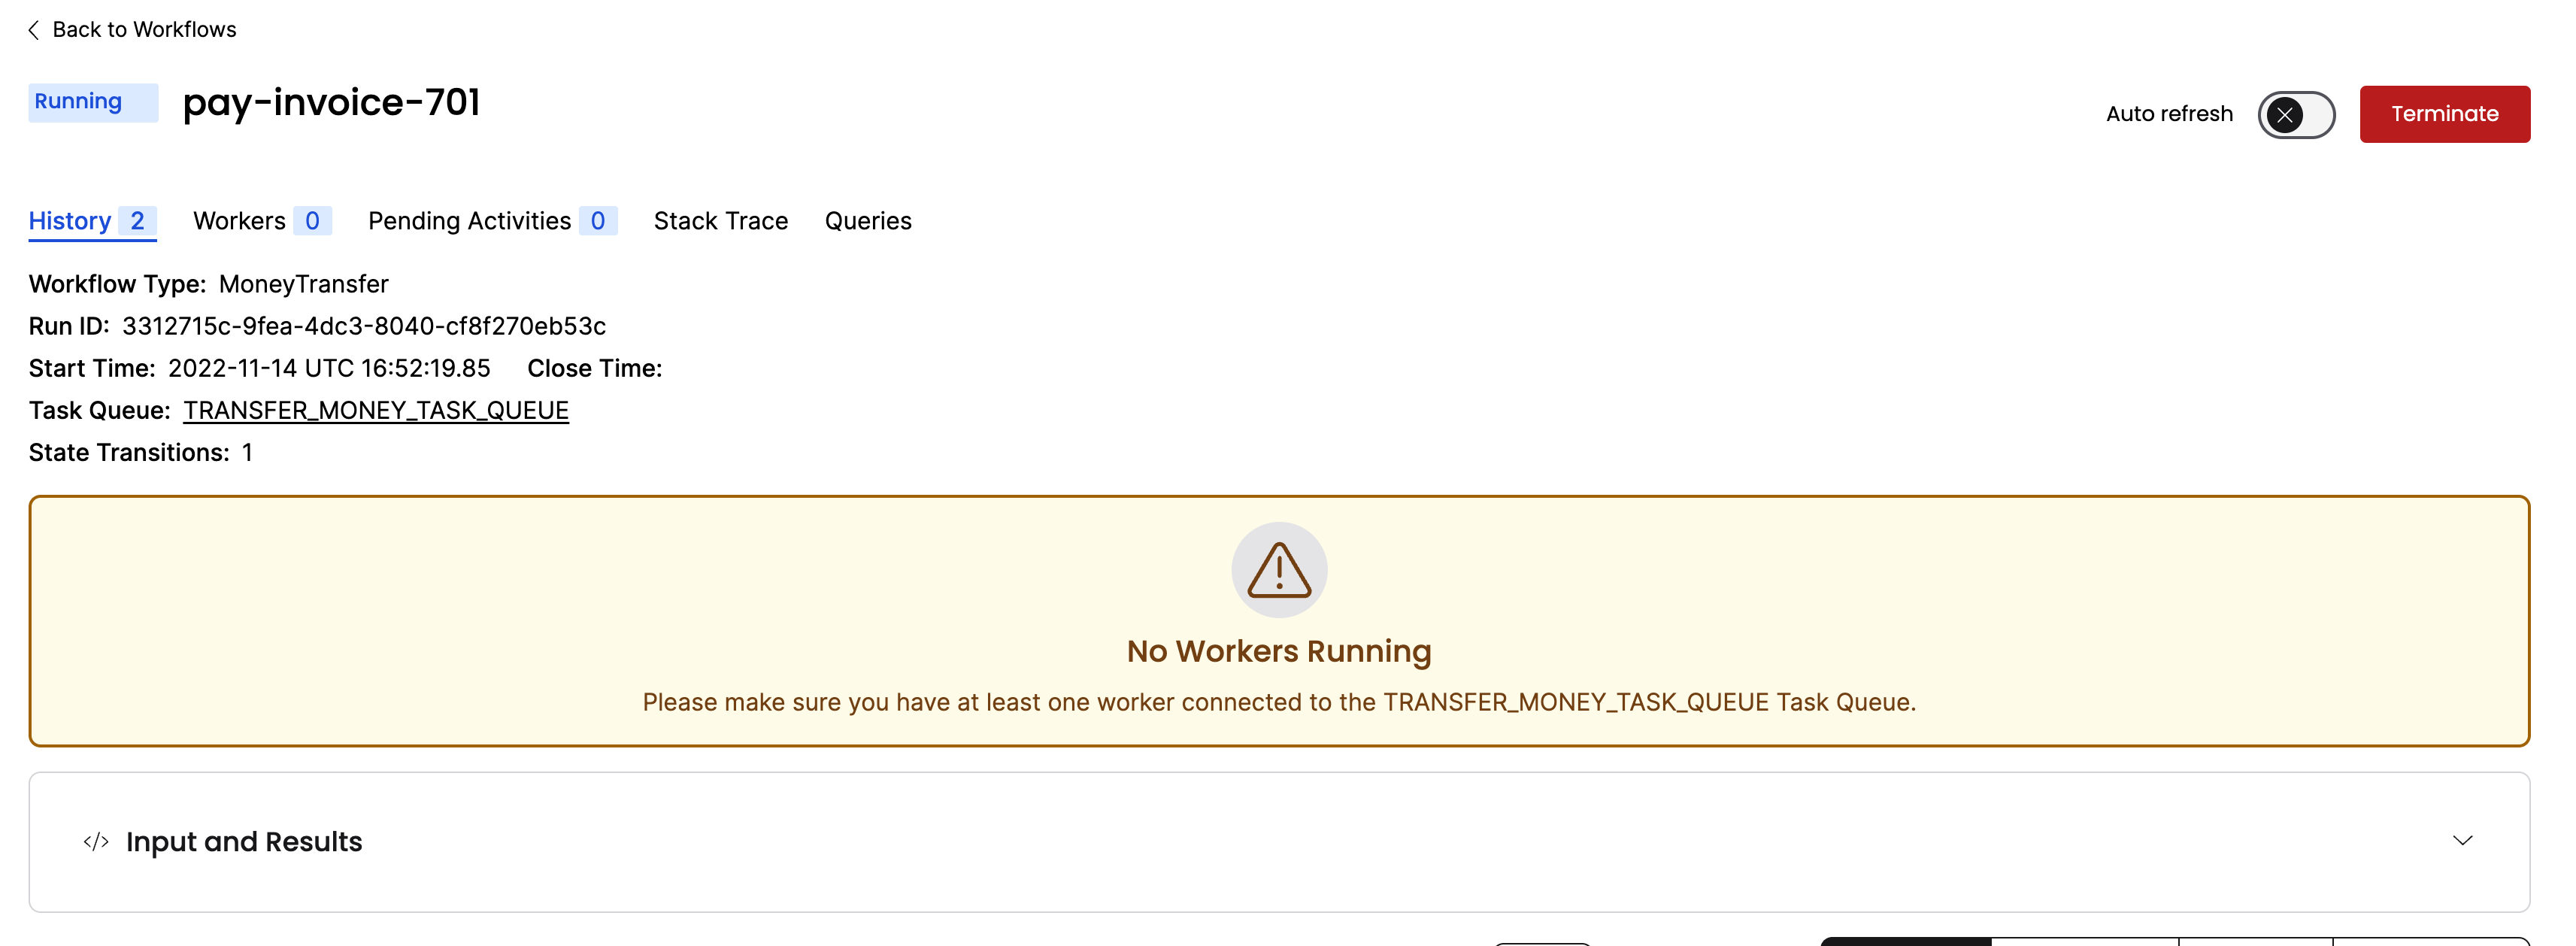
Click the Input and Results section to see the inputs:
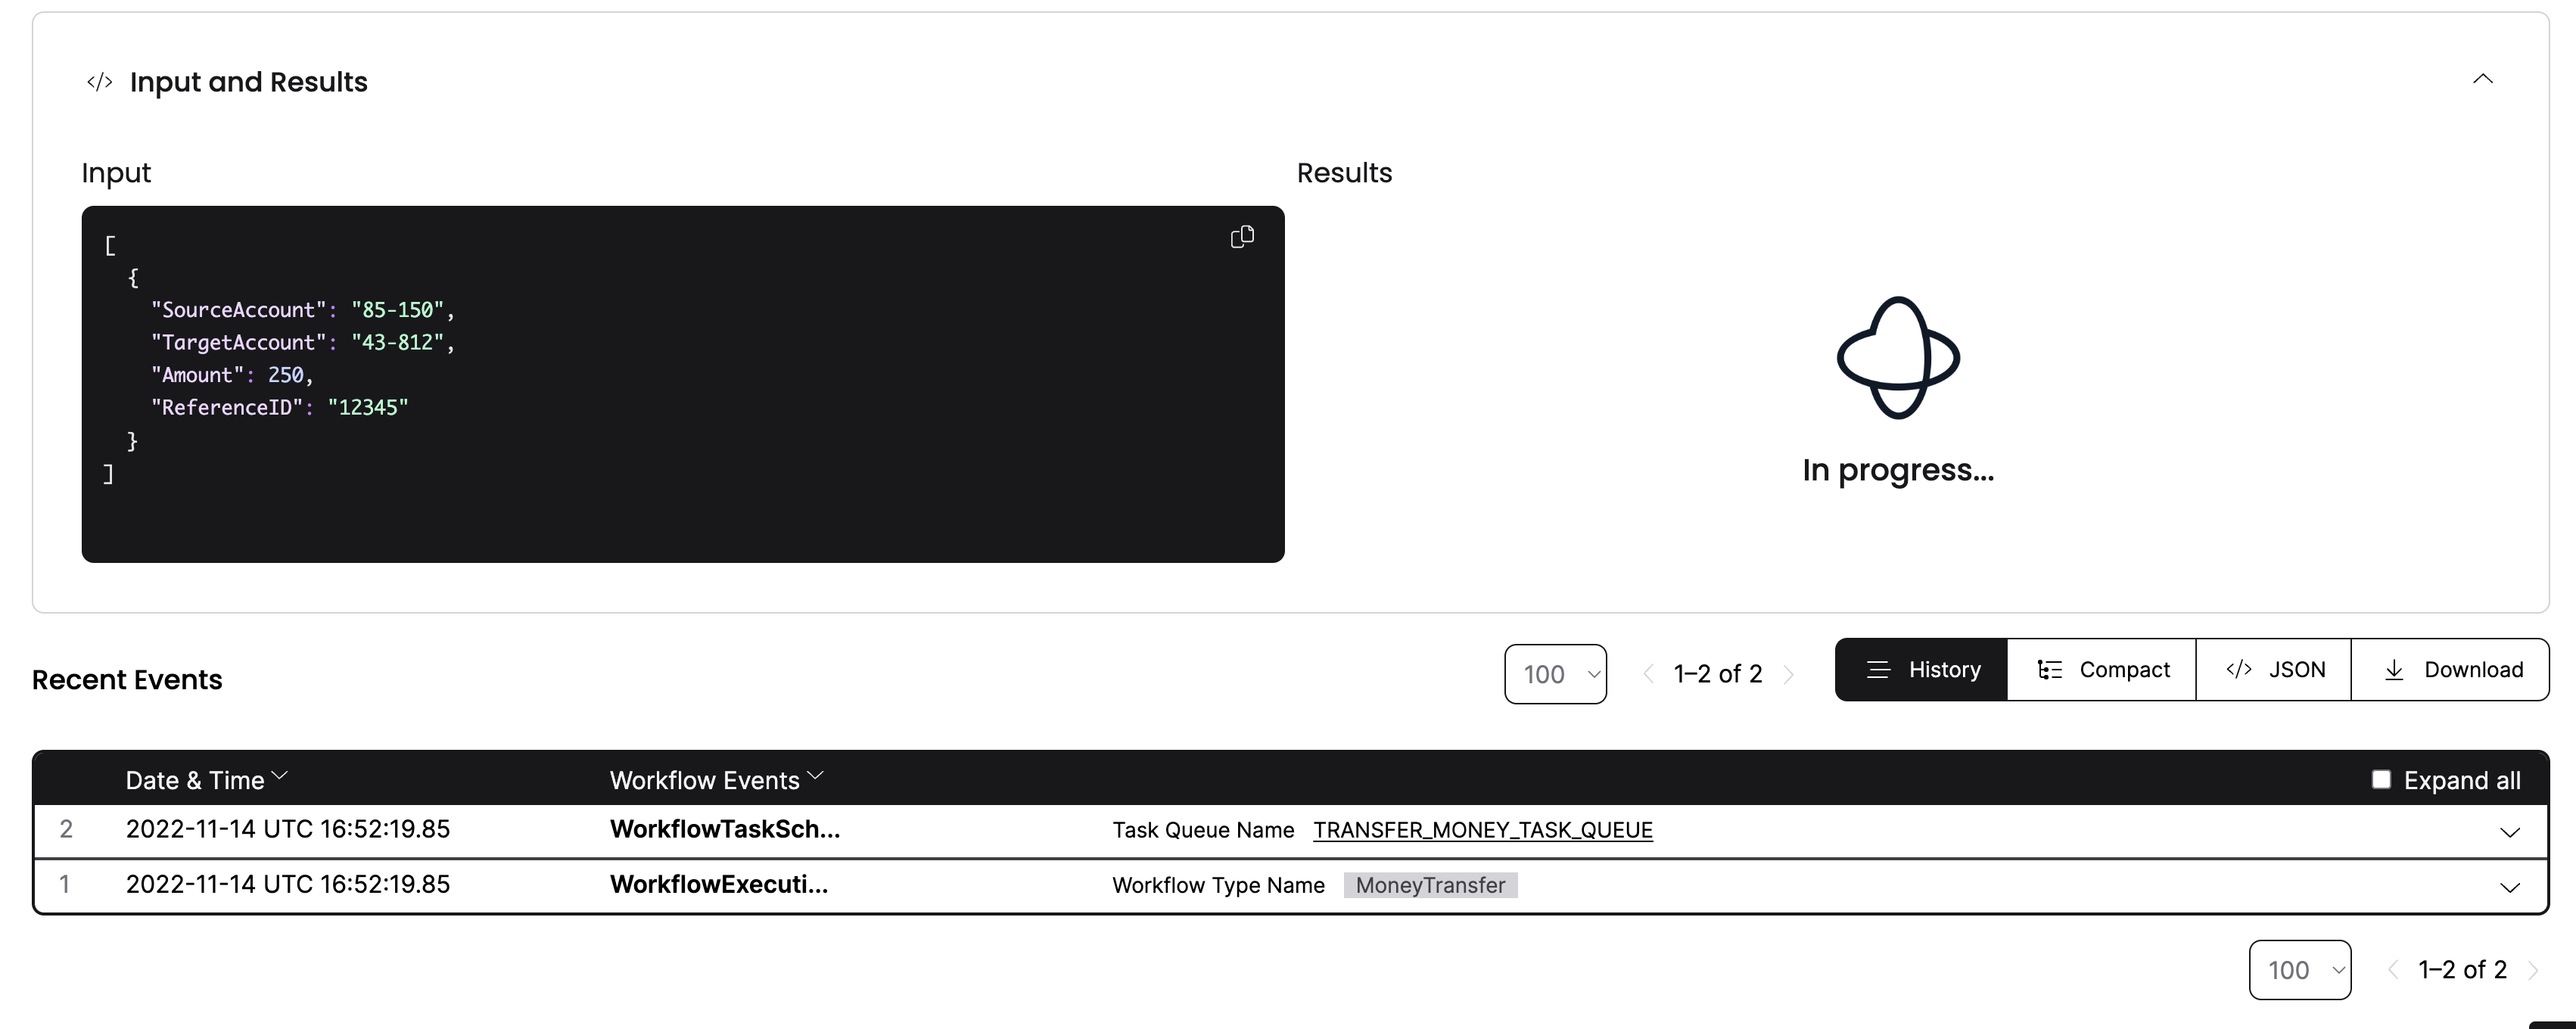
You see your inputs, but the results are in progress. The Workflow hasn't executed yet - there are no Workers connected to the Task Queue. You'll start the Worker next.
Start the Worker
A Worker:
- listens only to the Task Queue that it is registered to.
- can only execute Workflows and Activities registered to it.
- knows which piece of code to execute from Tasks that it gets from the Task Queue.
In this project, worker/main.go connects to the Temporal Cluster, specifies the Task Queue to use, and registers the Workflow and the three Activities:
func main() {

	c, err := client.Dial(client.Options{})
	if err != nil {
		log.Fatalln("Unable to create Temporal client.", err)
	}
	defer c.Close()

	w := worker.New(c, app.MoneyTransferTaskQueueName, worker.Options{})

	// This worker hosts both Workflow and Activity functions.
	w.RegisterWorkflow(app.MoneyTransfer)
	w.RegisterActivity(app.Withdraw)
	w.RegisterActivity(app.Deposit)
	w.RegisterActivity(app.Refund)

	// Start listening to the Task Queue.
	err = w.Run(worker.InterruptCh())
	if err != nil {
		log.Fatalln("unable to start Worker", err)
	}
}
Note that the Worker listens to the same Task Queue you used when you started the Workflow Execution.
Open a new terminal window and switch to your project directory:
cd money-transfer-project-template-go
In this new terminal window, run worker/main.go:
go run worker/main.go
When you start the Worker, it begins polling the Task Queue for Tasks to process:
2022/11/14 10:55:43 INFO  No logger configured for temporal client. Created default one.
2022/11/14 10:55:43 INFO  Started Worker Namespace default TaskQueue TRANSFER_MONEY_TASK_QUEUE WorkerID 76984@temporal.local@
2022/11/14 10:55:43 DEBUG ExecuteActivity ActivityType Withdraw
2022/11/14 10:55:43 Withdrawing $250 from account 85-150.

2022/11/14 10:55:43 DEBUG ExecuteActivity ActivityType Deposit
2022/11/14 10:55:43 Depositing $250 into account 43-812.
Switch back to the terminal where your start/main.go program is running, and you'll see it's completed:
...

2022/11/14 10:55:43 Transfer complete (transaction IDs: W1779185060, D4129841576)
Check the Web UI again. You'll see one Worker registered, and the Workflow status shows that it completed:
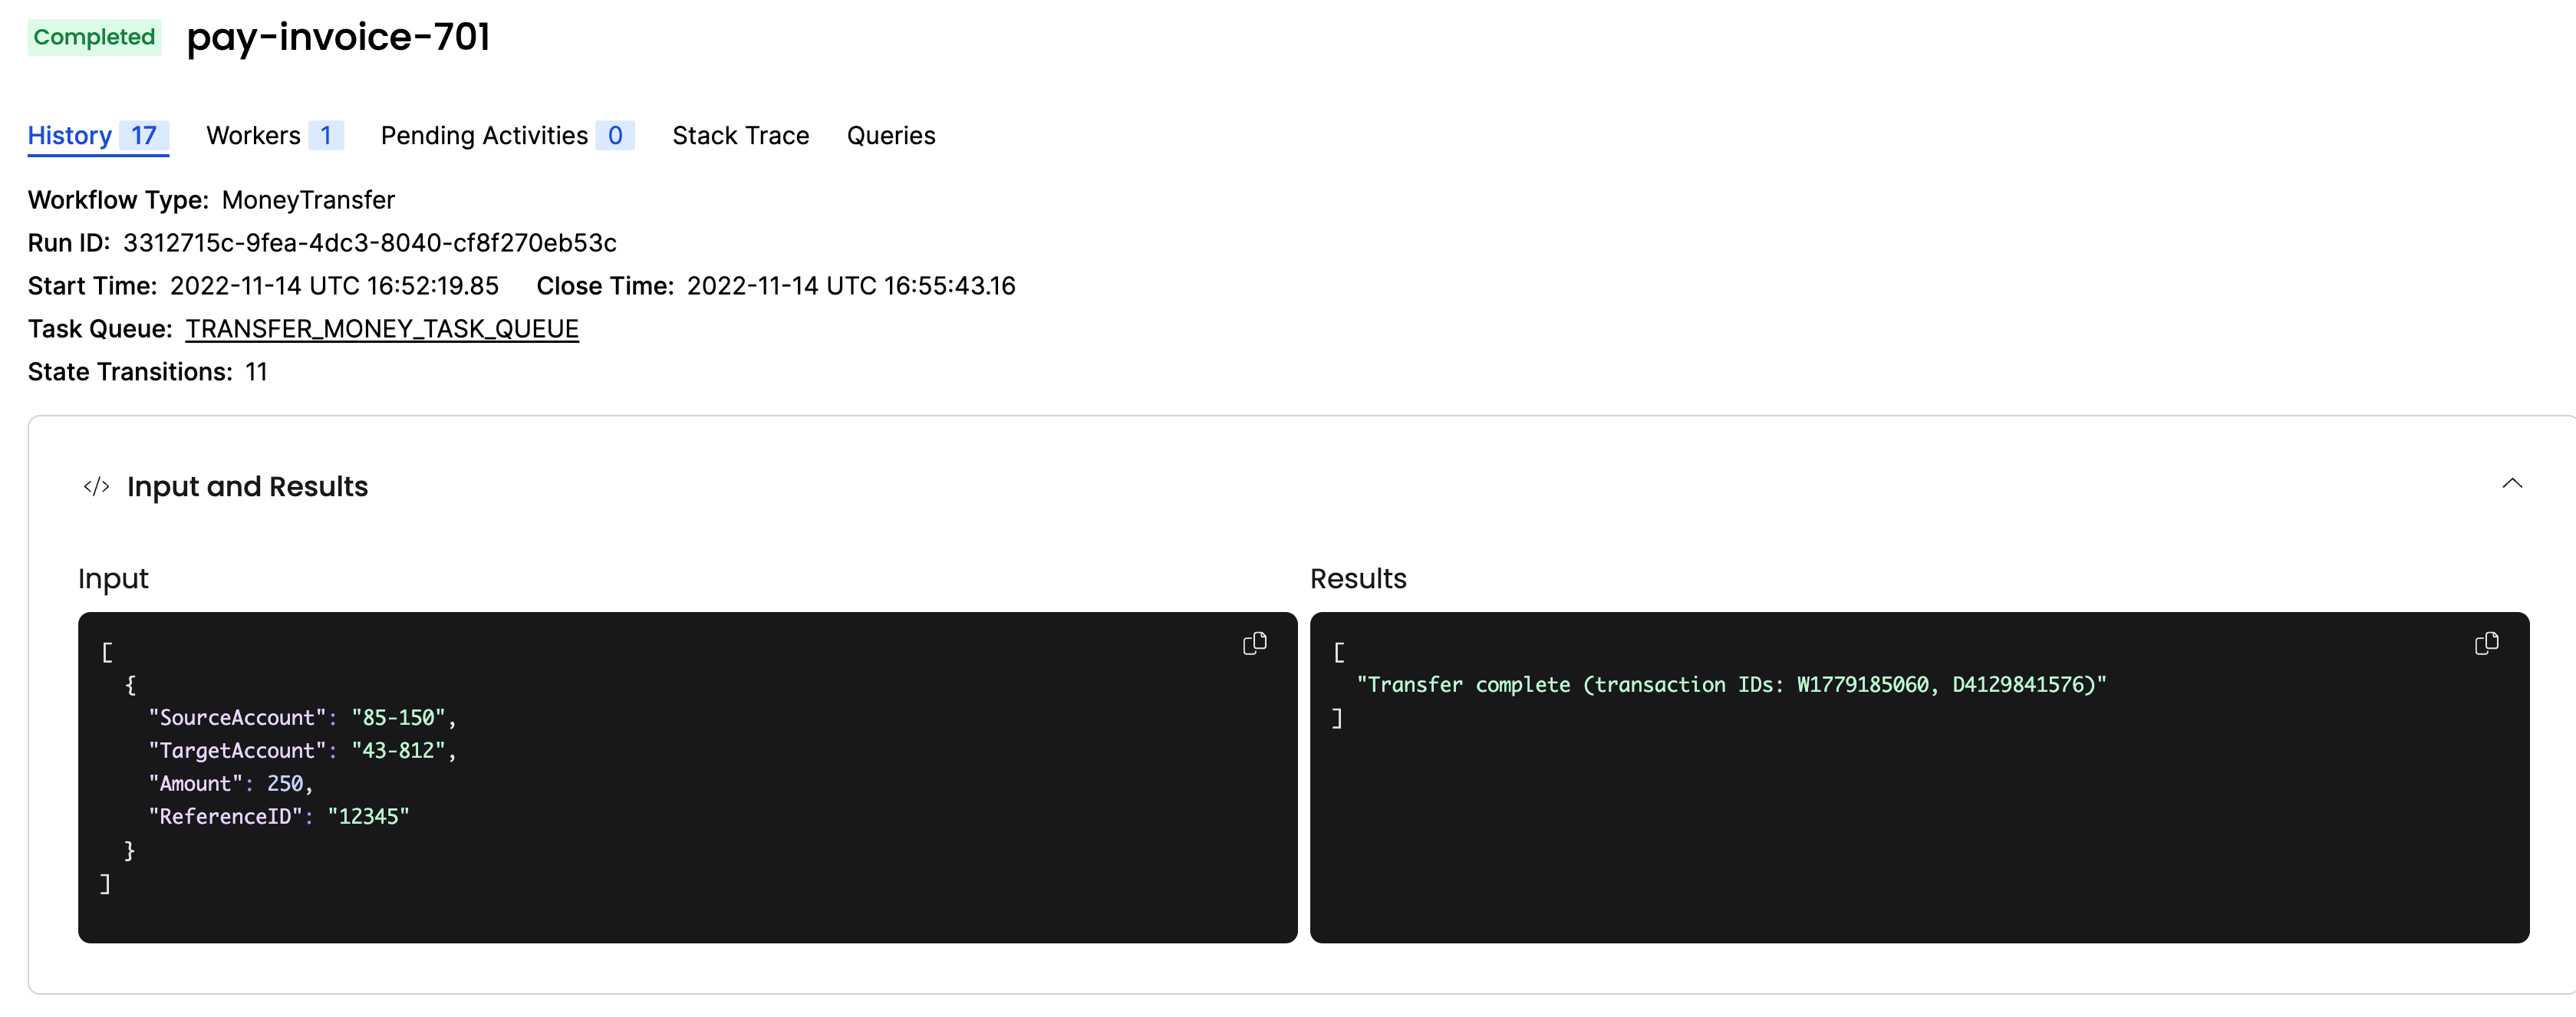
Each of these steps is recorded in the Event History, which you can audit in the Web UI under the History tab next to Summary.
You just ran a Temporal Workflow application and saw how Workflows, Activities, and Workers interact. Next you'll explore how Temporal gives you tools to handle failures.
Get notified when we launch new educational content
New courses, tutorials, and learning resources - straight to your inbox.